Creating a Shallow Depth of Field Effect with Photoshop 2022
In my recent video I was explaining how the new ‘automatic selections on hover’ feature in Adobe Photoshop 2022 can be used in conjunction with the lens blur filter, to create a shallow depth of field effect. I think it’s a much better alternative to Photoshop’s Depth Blur neural filter.
You can go ahead and watch the video to see the process, but to clarify, here are the steps I went through.
Step 1
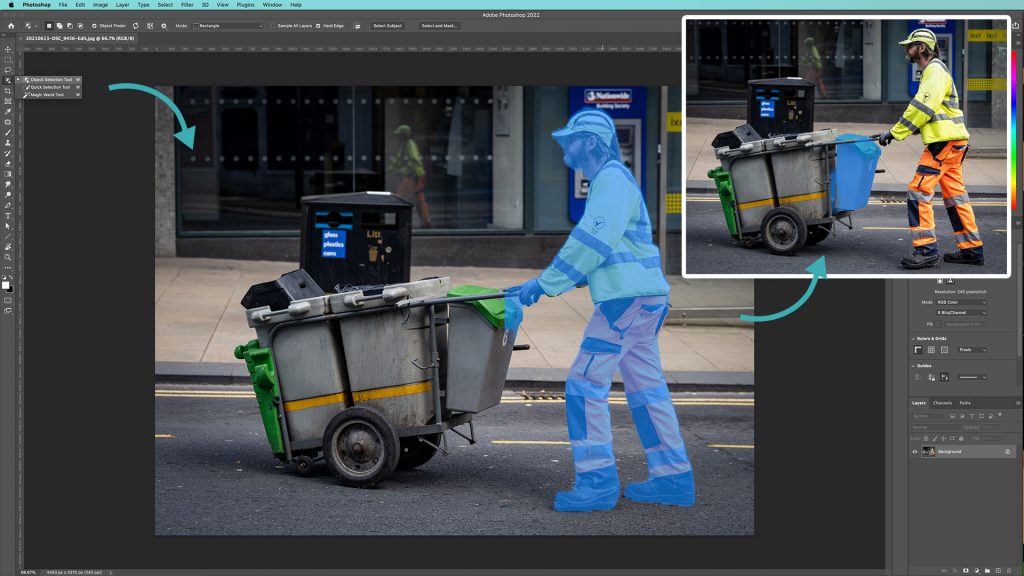
Select the ‘Object Selection Tool’. It’s the fourth icon down in the tool palette and you can click and hold your mouse button on the icon to pop out the menu and select the tool. With the new features in Photoshop 2022, you can simply hover over a subject and areas will automatically be highlighted as you do so. Click on these areas to make a selection. You can hold shift on your keyboard, and select more areas to add them to your selection area.
Step 2
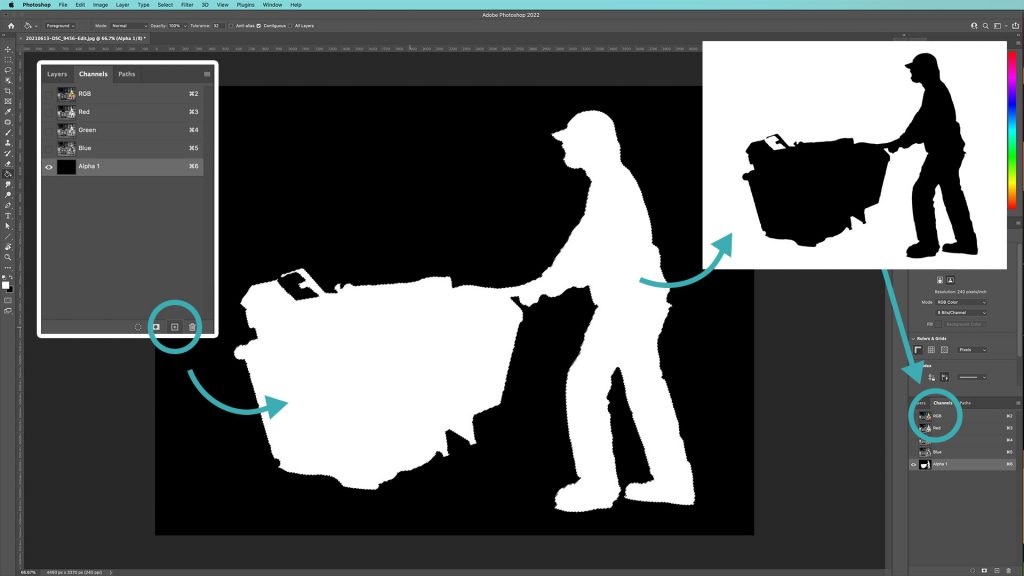
With your selection area complete, find the Channels tab, just to the right of the tab for the Layers palette. Click on this to access the Channels palette. Click the icon at the bottom of the palette which looks like a square with a cross in the middle. This will create a new channel, which will be called Alpha 1. Using the Paintbucket tool (13th icon down in the tool palette) and white as your foreground colour, click once inside your selection area to fill it with white. Press CMD+D (or CTRL+D on Windows) to deselect your area, now hit CMD+I (CTRL+I) to invert your selection. Your subject should now be black on a white background. Now click on the RGB channel at the top of the Channels palette to see you image again, and click back on the Layers tab to go back to the Layers palette.
Step 3
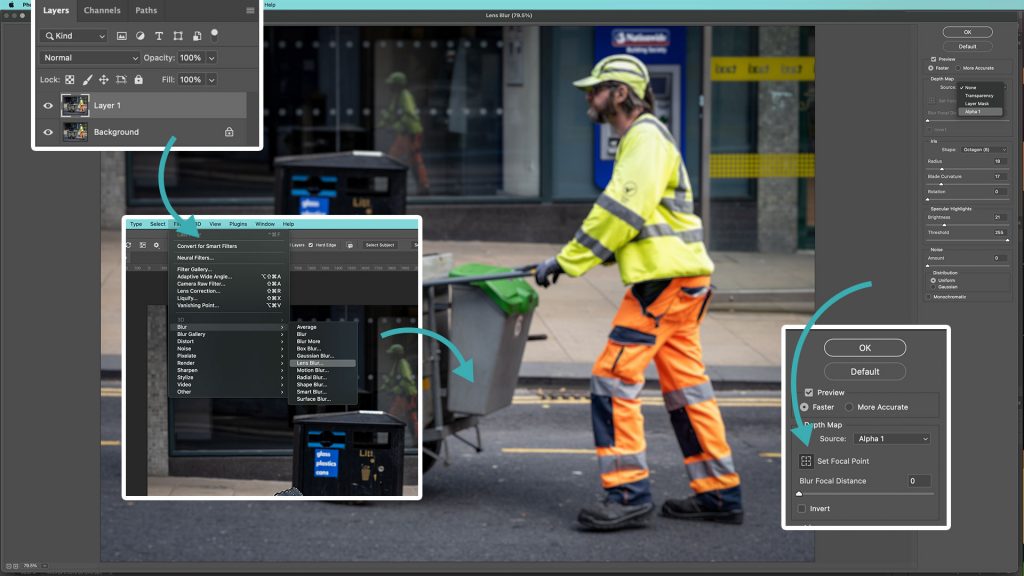
Click once on the Background layer and use CMD+J (CTRL+J) to duplicate this layer, creating an identical layer called Layer 1. With this layer selected, go to the Filter dropdown menu at the top of the screen. Click this menu, then go down to Blur to pop out another menu where you can choose Lens Blur. Clicking this opens a new window where you can see a preview of your image with the filter applied. On the right, under Source, drop down the menu and choose Alpha 1. Now click the button next to Set Focal Point and click once on the area of your image you would like to be in focus. You can increase the strength of the blur effect by dragging the Radius slider to the right. When you are happy withe effect, click Ok in the top right of the window.
Step 4
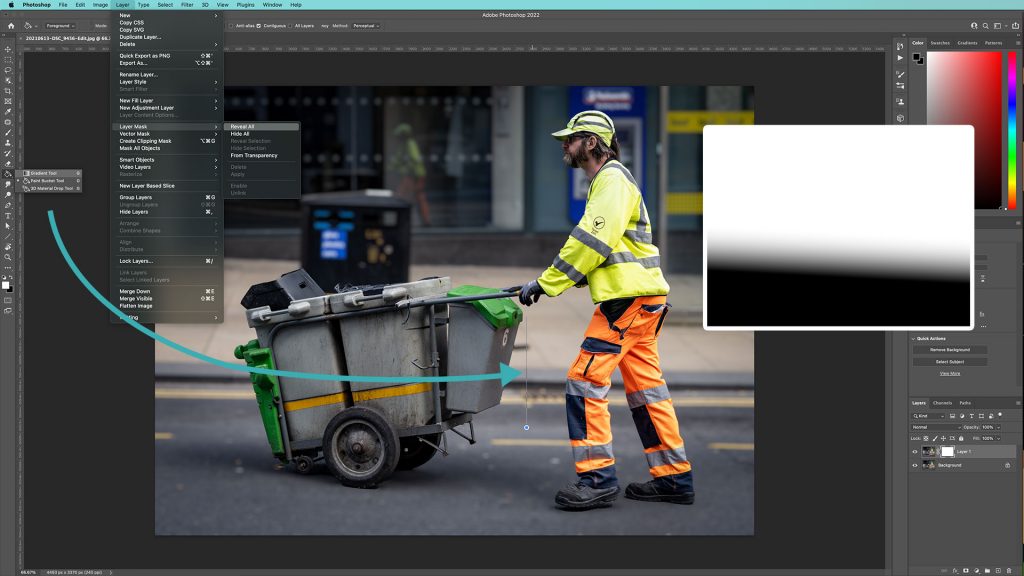
We need to bring the ground in the foreground of our image into focus. To do this, go to the Layer dropdown at the top of the screen, find Layer Mask and go across to Reveal All. Clicking this will add a mask to Layer 1. We can now erase parts of our layer by painting black areas on to the mask. Go back to the Paintbucket tool, click and hold the icon and find the Gradient tool. Using this, draw a gradient from the bottom of your image, going upwards to where you want to the blur effect to start appearing. This will create a black gradient at the bottom of your layer, masking it out and revealing the layer below (which doesn’t have the blur effect applied).
Final Result
If done right, this process can produce some very plausible results, creating a realistic looking shallow depth of field effect in your image.
I have many more post-processing videos over on my YouTube channel, as well as lots of videos where I’m out and about capturing all types of photography, such as landscape, wildlife, macro, street and more. Check it out now and please consider subscribing!
Go back to main blog page
Leave a Reply